Changing a dirty diaper can be one of the most daunting challenges that new parents have to deal with. Whether you’re faced with the prospect of changing your very first diaper or you’ve already changed hundreds, a few tips and a simple step-by-step process will make it all go smoother.
In this article, Mustela’s experts will tell you the best (and correct) way to change a diaper so your baby can stay clean, happy, and comfortable. After that, we’ll also give you some advice for when you run into one of the most common — and most frustrating — diaper changing woes: diaper rash.
Before we give you the step-by-step of how to change a diaper, let’s talk about how often you need to do the diaper-changing ritual. This is an important question that a lot of parents ask themselves.
Table Of Contents
- How Often To Change A Diaper
- Four Pre-Diaper-Change Tips
- Nine Steps To A Successful Diaper Change
- How To Treat Diaper Rash

How Often To Change A Diaper
While diaper-changing frequency will depend on your little one’s needs (every baby is different!), you can generally expect to change their diaper every couple of hours.
That being said, a newborn baby soils a diaper more often than an older baby, so you might find that you’re changing diapers more frequently when they’re little and less frequently as they grow older.
Plan to change your baby’s diaper every two or three hours. However, if your nose detects evidence of a poopy diaper, change it as soon as you can. If your baby’s tooshie sits too long in their poop, it can irritate their skin and make them more likely to get diaper rash (more on that later).
Spending too long in a soiled diaper will also make your child more susceptible to a bladder infection or yeast infection. For both of these reasons, you’ll want to get your baby’s bottom clean as soon as possible.
What about diaper changing at nighttime? Make sure you put your baby to bed in a clean diaper to start them off on the right foot. But what’s a parent to do when baby wets or soils their diaper in the middle of the night?
If your baby wakes up crying and they’ve got a smelly diaper, you’ll want to change it but do so as quietly as possible. Your goal is to get the job done and get everyone back to sleep!
You can prepare for nighttime diaper changes by dressing your little one in pajamas that give you easy access to their diaper and make the changing process go more smoothly.
If you’re changing your little one’s diaper during a nighttime feeding, either do so before you feed them or halfway through their feeding. If you wait to change their diaper until after you feed them, you might risk waking your baby up, which is exactly not what you want to do at that point!
And, finally, while you’re changing and feeding your baby at night, keep the lights low and try not to get your baby excited.
We’re almost ready to get into the step-by-step of a diaper change, but before we do, we have a few pre-diaper-change tips to make every change easier.
Four Pre-Diaper-Change Tips

Tip #1: Have Everything At Hand
Whether you change your baby on the floor in the living room or on a changing table in the nursery, you’re going to need everything within arm's reach. First and foremost, this will allow you to keep your focus on your newborn.
This is especially important if you’re changing your little one on a changing table, whether at home or out of the house. You should never turn your back on your baby or lose contact just to retrieve a fresh diaper or a tube of cream. It only takes a second for an accident to happen.
Having all your supplies — clean diapers, wipes, creams — close at hand can also make the process go much faster. The less time your baby is uncovered, the less chance there is of an accident happening on your nice clean floor or freshly washed changing pad cover.
Tip #2: Place Your Baby On A Washable Changing Pad
Placing your baby on a washable changing pad provides an extra layer of protection against accidents. The easiest pads to maintain are covered in plastic. The plastic coating makes clean-up a breeze: just wipe and go.
Some plastic-covered pads, like those typically found on stationary changing furniture, are made of thick foam for your baby’s comfort. Other pads, like those for on the go, have thinner padding but are foldable for easy packing. Either type of pad will do.
Tip #3: Wash Your Hands

Before you jump into actually changing your baby’s diaper, it’s wise to wash your hands. This is an often overlooked, yet important, step for keeping your baby healthy. But sometimes, you won’t have water and soap available...or, honestly, you might just forget.
That’s okay. Just grab a diaper wipe, like our Certified Organic Cotton Wipes with Water, and give your hands a quick rub. Only have a few wipes left for your baby? Try using Mustela’s No Rinse Cleansing Water to clean both your hands and your baby’s bottom.
Tip #4: Keep Ahold Of Your Baby At All Times
This is especially important if you place your baby on a tall piece of furniture, like a changing table. Make sure you have one hand on your baby at all times to keep them from wiggling too far away from you. If your changing table has a retention strap (like a small seat belt), buckle it over your baby’s body to keep them secure.
You might be wondering if this tip also applies for newborns who haven’t mastered the art of rolling over. The answer is “yes!”
Generally, babies start to roll over around four months old. But that doesn’t mean your baby might not do a flip or two before that.
Since you can never quite know when your baby will get the hang of moving around or rolling over, it’s smart to always keep a hand on your little one so they don’t end up rolling off the changing table.
If you change your baby on the floor, try giving then a toy or small stuffed animal to keep them entertained while you take care of the diaper. When you place your baby on the floor, make sure there are no small objects within reach that can hurt your little one. Remember, babies put everything in their mouths.

Now that you’ve got those tips in mind, you’re ready to get started! Here are the nine steps to a successful diaper change.
Nine Steps To A Successful Diaper Change
1) Entertain Your Baby
Before you get to the real work, make a plan to keep your baby entertained during the diaper change. Try hanging a mobile above their changing area or even playing a little hiding game while getting the job done: be silly and put the diaper on your head or hide it in your shirt or behind your back.
If you need to keep a wiggly baby occupied, put an interesting toy in their hands. This may also help if your little one has a habit of reaching down toward their diaper while you’re trying to change them.
Take advantage of the time you have during a diaper change to bond and make eye contact with your baby. Talk to them or sing a song — you can even make up your own diaper changing song if you’re feeling creative!
You can also make diaper changing educational by narrating to them what you’re doing, telling them what to expect (“This is wipe is going to be cold!”), or counting their feet and toes.
2) Undo The Diaper
All right, are you ready? Take a few breaths and undo the tape holding the diaper together. Fold the front of the diaper down, and then progress through the next five steps as quickly, but safely, as possible. Here we go!
3) Grasp Your Baby By The Ankles With One Hand
The simplest way to get the diaper out from under your baby’s backside is to cross their legs at the ankles, and then grab them both — gently! — with your left hand (or your right hand if you’re a lefty).
4) Lift Your Baby's Bottom And Remove The Dirty Diaper
Lift your baby’s bottom just enough to slide the dirty diaper from under their back. Just a few inches is enough to get your baby off the diaper and to give you easy access for cleaning.
When the dirty diaper is out from under your baby, keep pulling up on their ankles and set the dirty diaper aside. Leave the diaper open for a few moments while you complete the next step. Keep those ankles up!
5) Wipe From Front To Back
At this point, diaper wipes like Mustela's Cleansing Wipes with Avocado will be your best friend. With a wipe in hand, wipe your baby’s diaper area from front to back (or top to bottom, depending on how you look at it).
Keep in mind that one wipe might not be enough. It’s okay to use as many as you need to get the job done.
When you first started changing diapers, you may have used handfuls at a time. That’s okay. Just keep practicing (as if you had a choice) and you’ll get better. When your baby is nearing potty-training age, you’ll be so adept at the process, you’ll be able to use one or two wipes for the whole thing.
When you’re finished with the dirty wipes, place them inside the open dirty diaper so you can later discard everything at once.
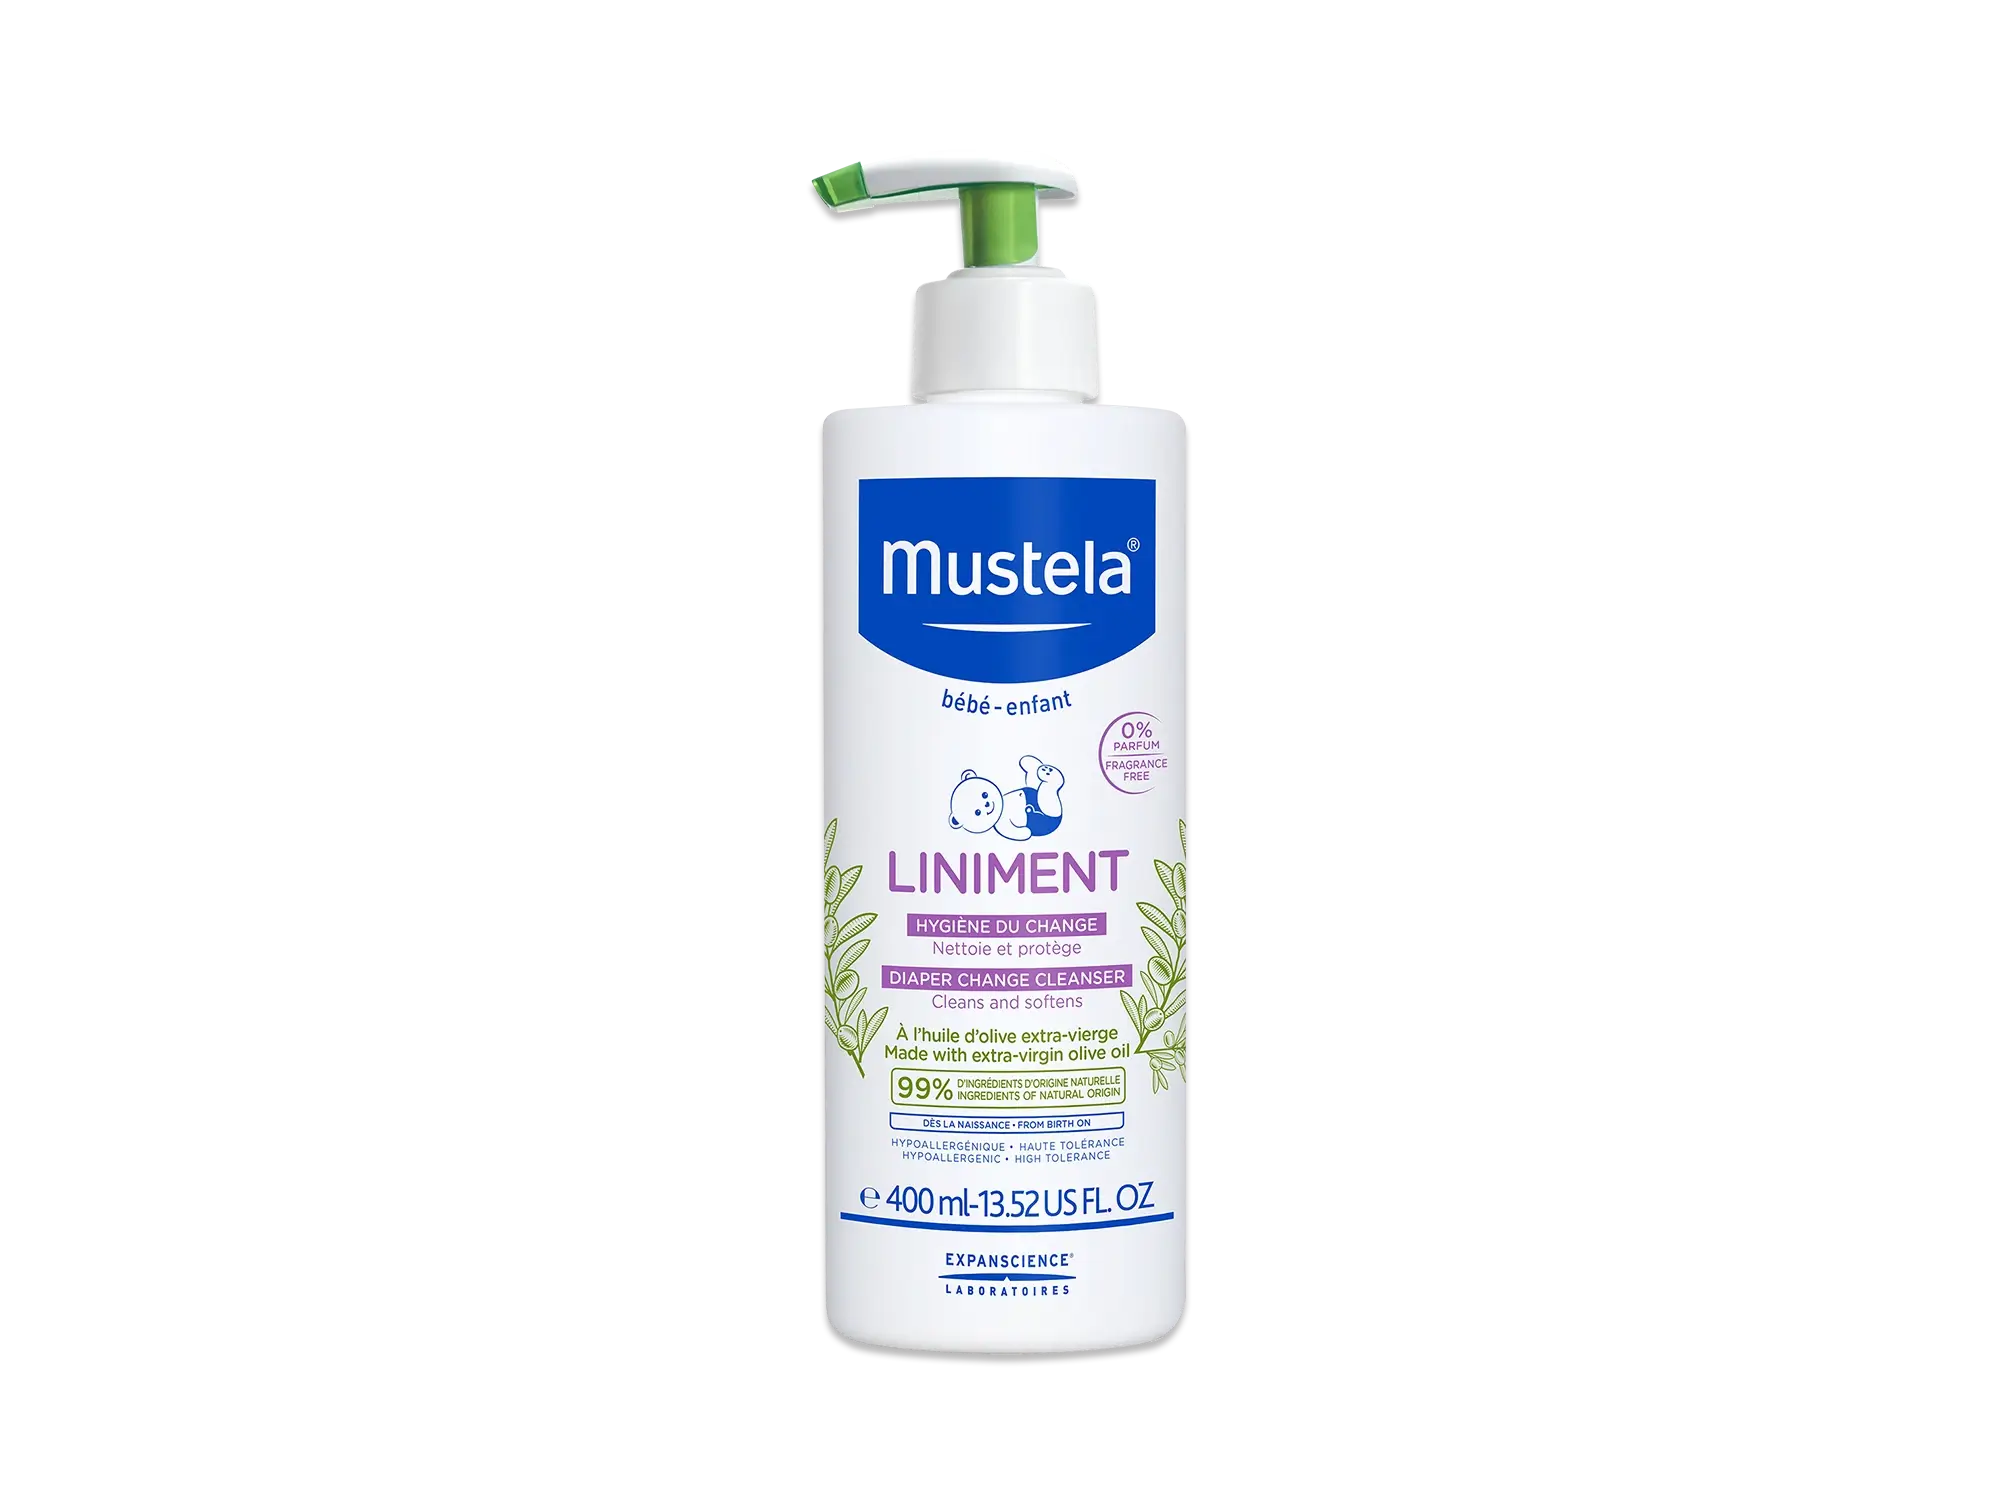
Now that your baby’s bottom is clean, it’s time to apply a diaper change cleanser, like Mustela’s Liniment, to keep your baby’s skin soft and smooth. Mustela’s Liniment provides skin-soothing nutrients and creates a moisture barrier on your baby’s skin that keeps it hydrated and healthy all day long.
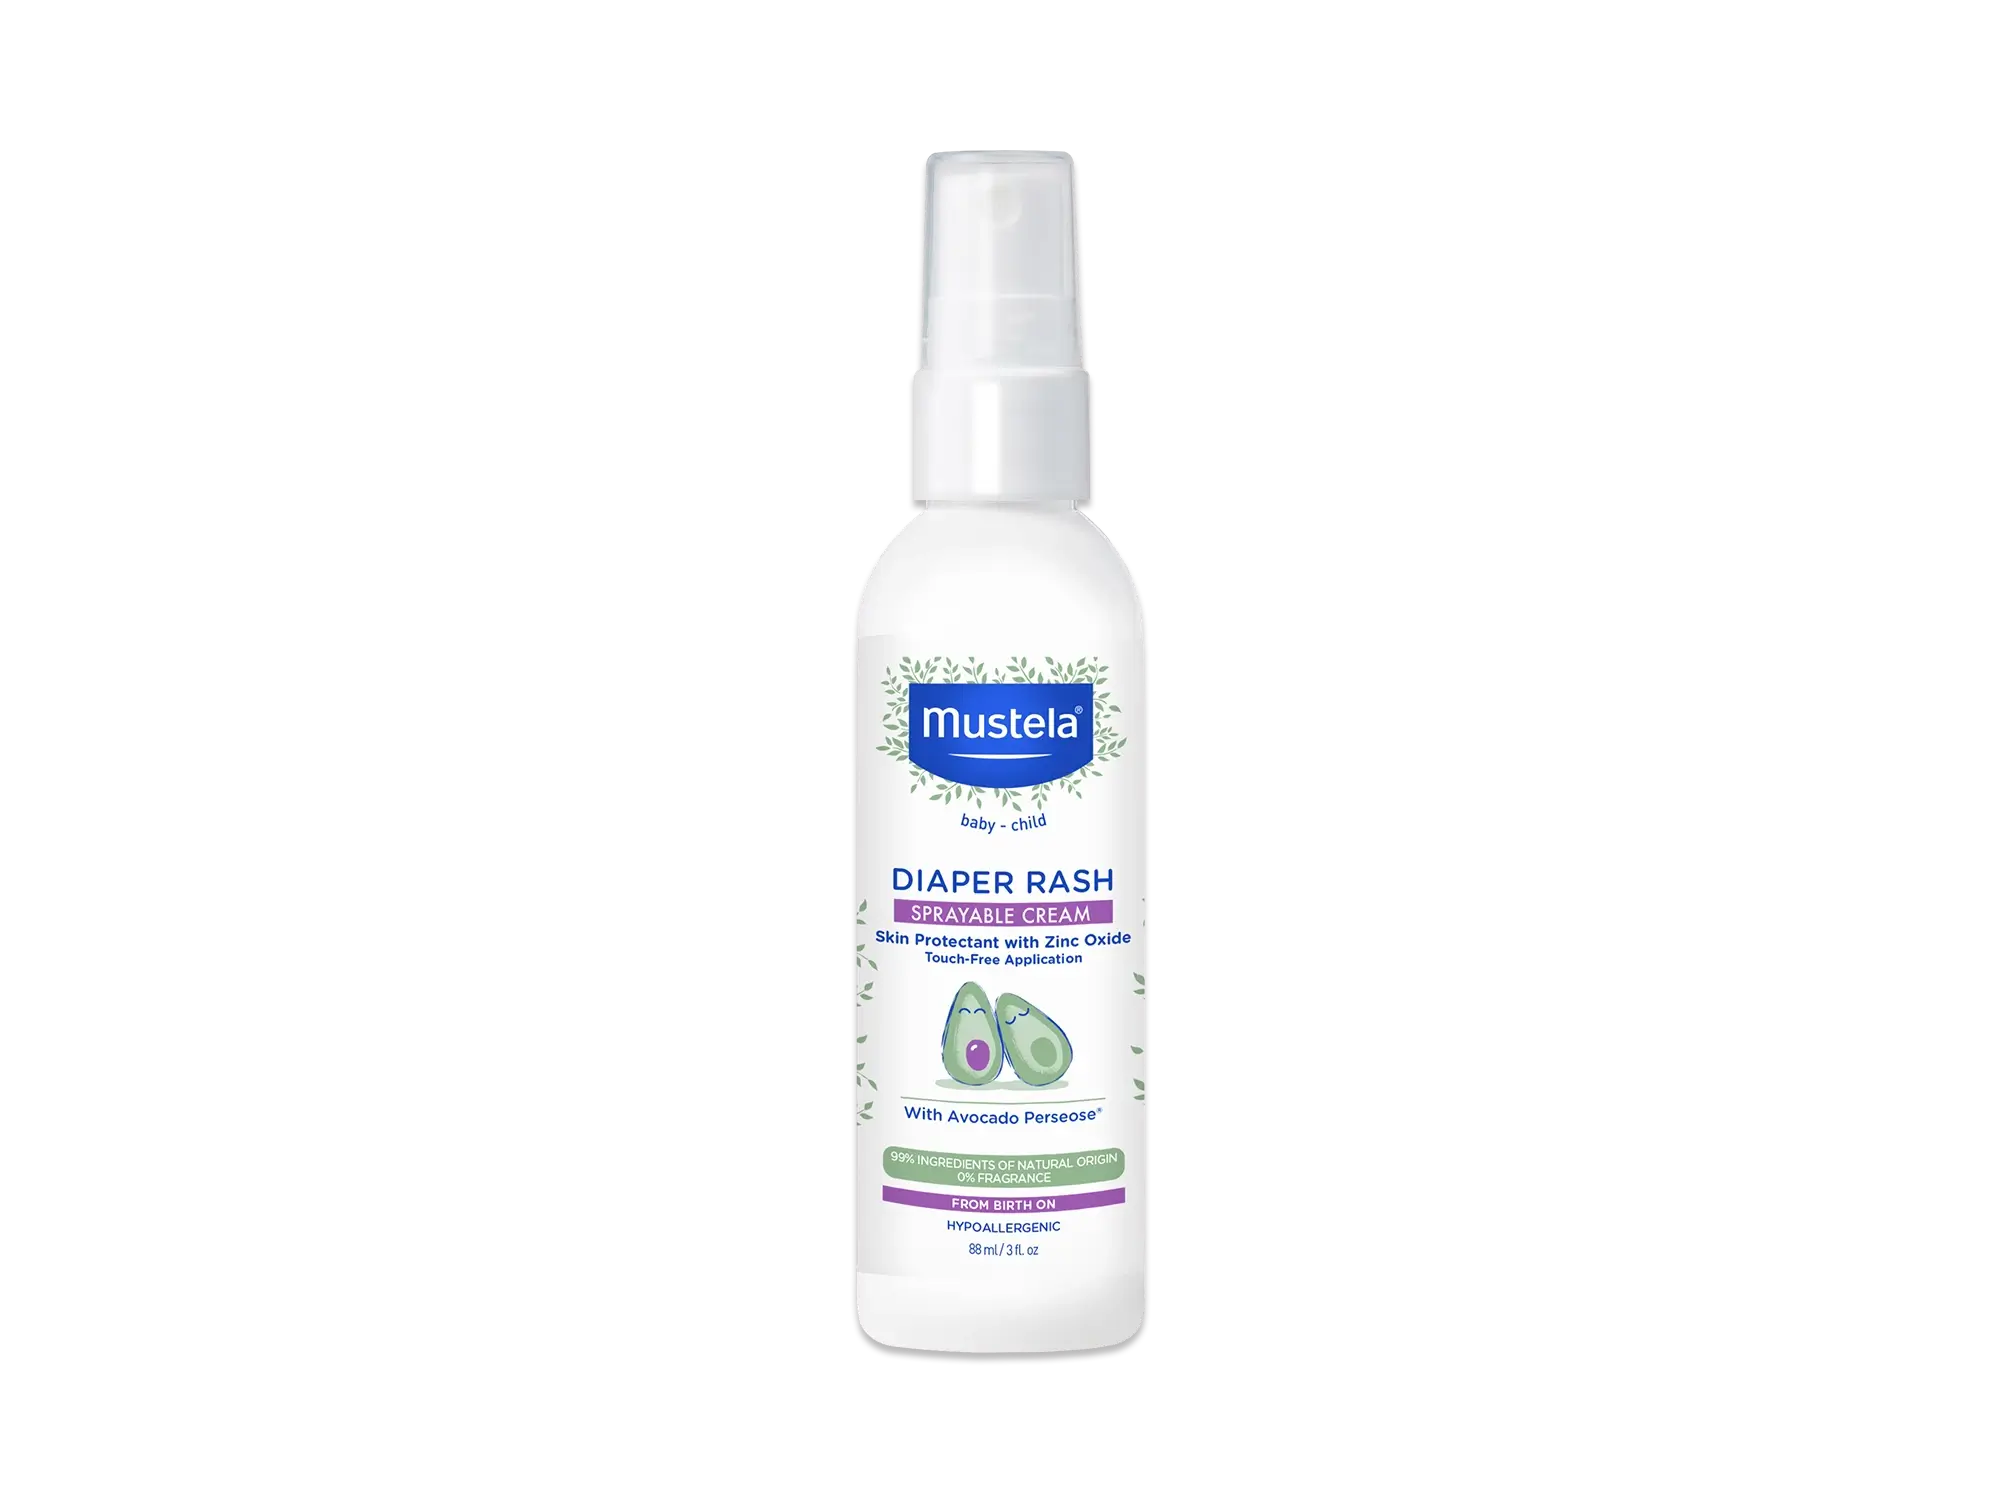
You can also use our Diaper Rash Sprayable Cream to seal out wetness and and soothe any irritation. In a convenient, sprayable bottle, this formula is perfect for on-the-go diaper changes.
Now that your baby is clean, cleansed, and ready to be re-diapered, take a moment to ask the following question:
Should You Give Your Baby A Bath?

We consider this an optional step (which is why we haven’t numbered it), but one that can be very important at times. Sometimes your baby is so dirty that no amount of wipes will get the job done. At other times, diaper rash may be rearing its ugly head.
In these instances, it can be soothing for your baby to play in the tub for a while.
Regardless of the circumstances that prompted the bath, it’s beneficial to add a few drops of oil, like Mustela’s Bath Oil, to the water to help moisturize skin. Then wash with a gentle cleanser, like Mustela’s Gentle Cleansing Gel, to fully clean your baby. If you want to add a little extra fun to your little one’s bath time, we recommend Mustela’s Multi-Sensory Bubble Bath.
When you’re done with the bath, return to your baby’s changing station and finish up with the next few steps.
6) Slide A Clean Diaper Under Your Baby
Gently take hold of your baby’s ankles again and lift slightly. Unfold a clean diaper (you’ll get used to doing it one-handed after a while) and slide it under your baby’s back. Make sure the tape tabs are in the back as you slide it under.
And if you think all that’s left is to tape the diaper closed, think again! We just put the clean diaper here at this point to protect against accidents. We’ve still got four very important steps to go.
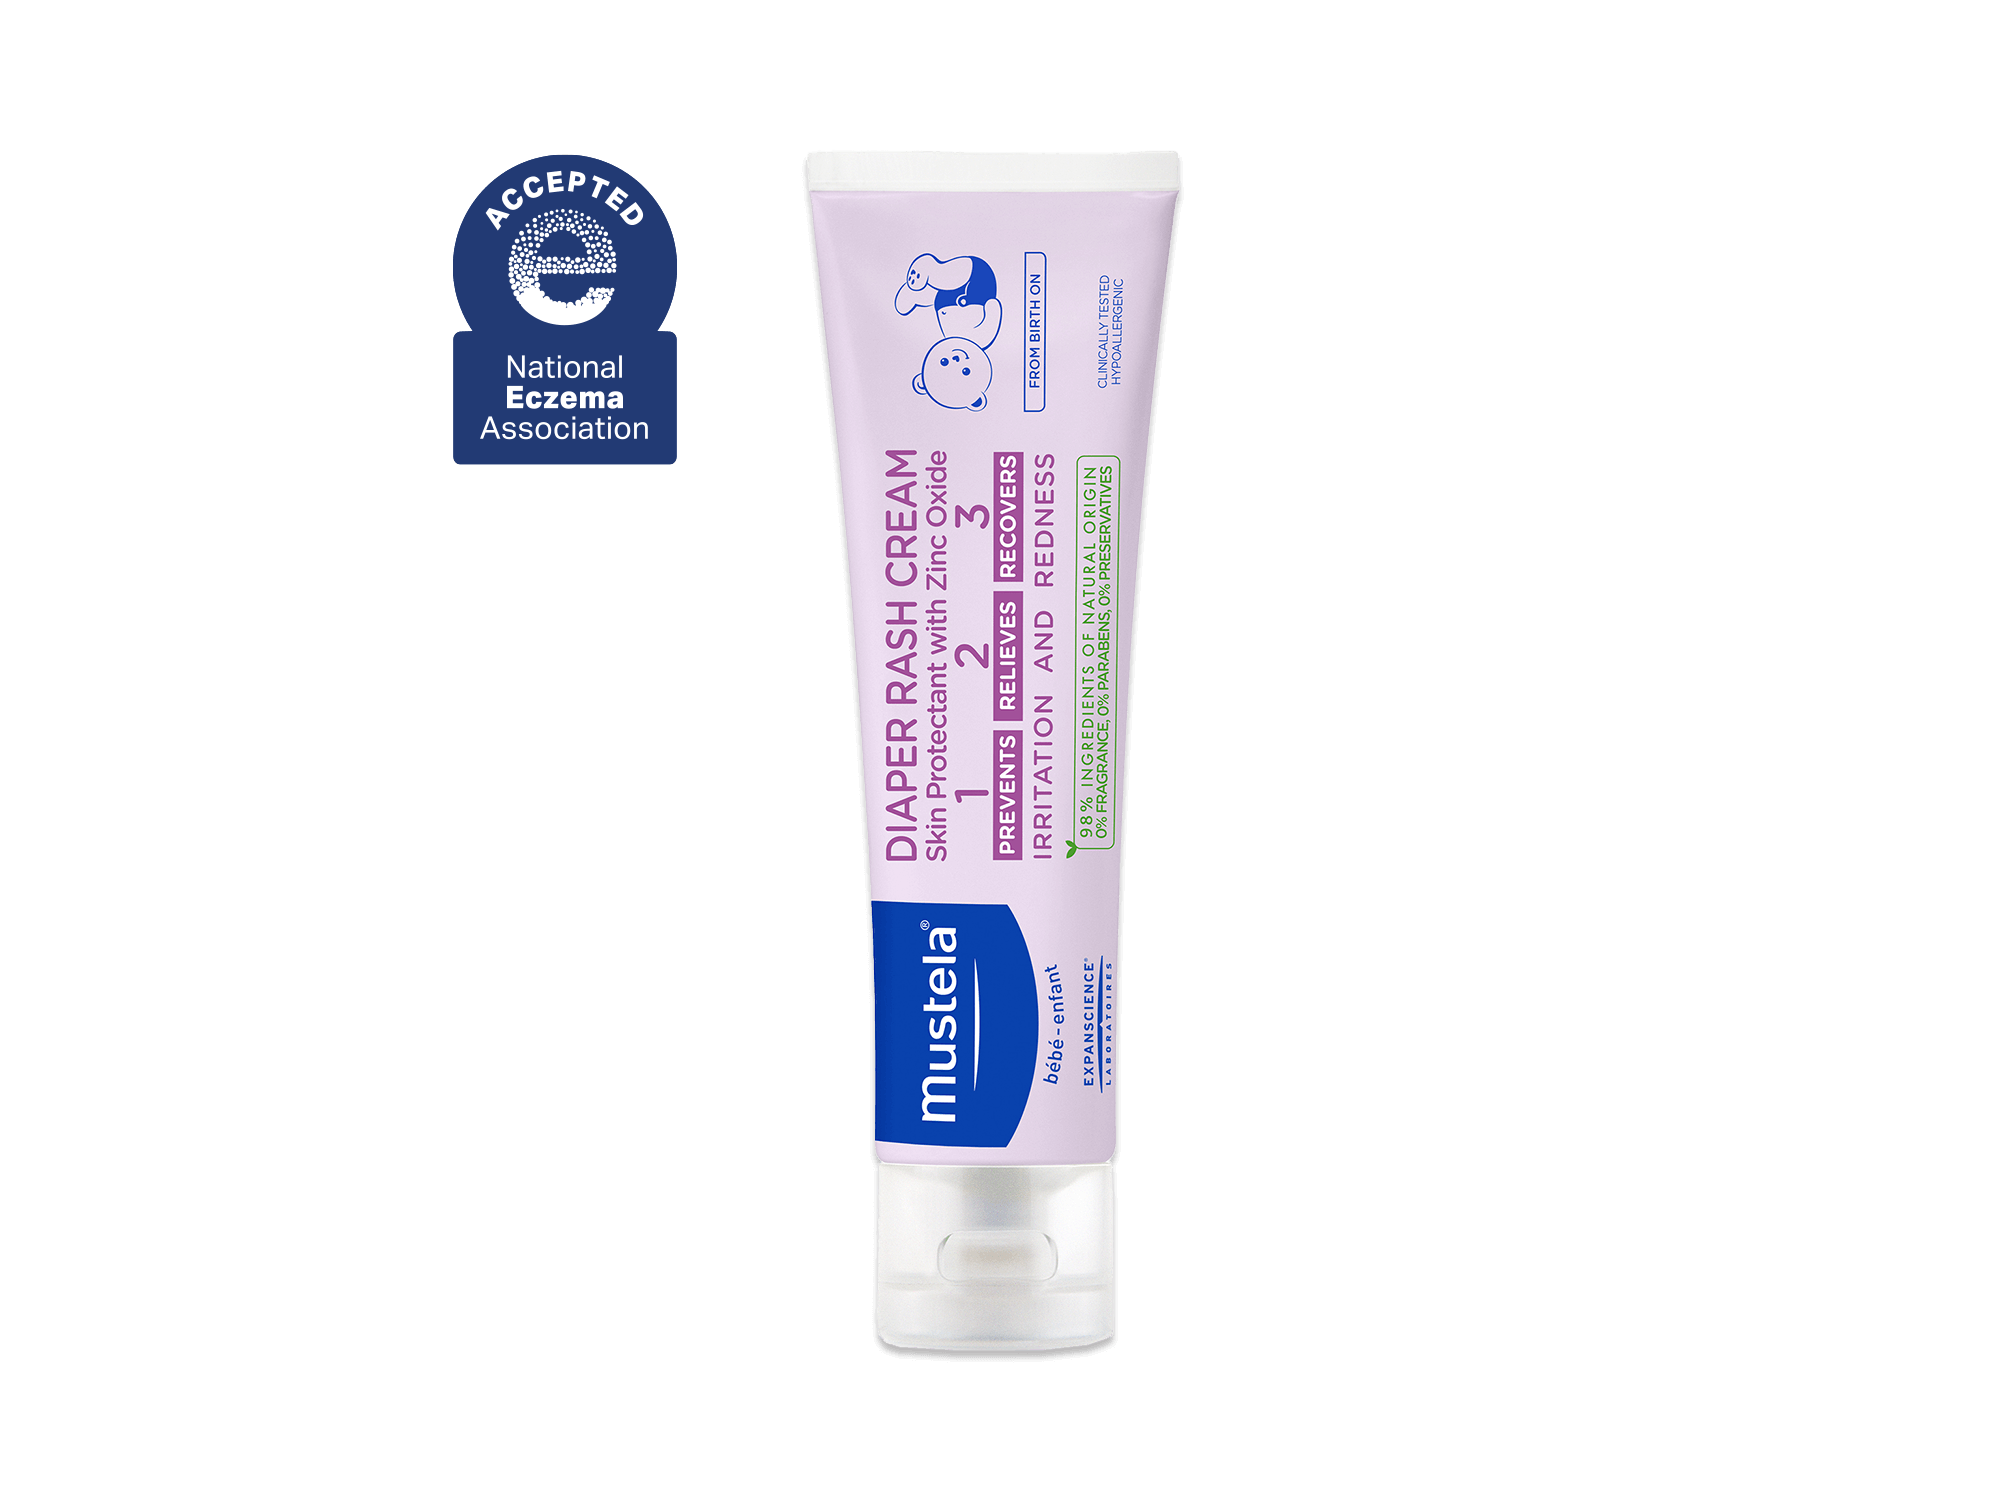
7) Apply A Diaper Rash Cream Daily

At some point in your baby’s life, they are going to develop diaper rash. It can happen when they're teething, their diet changes, or it gets too hot. It can even happen if your little one drinks too much.
Diaper rash is completely normal. So don’t worry, and apply Mustela’s Diaper Rash Cream 1-2-3 daily to both treat and prevent diaper rash and to help keep your baby comfortable and happy.
8) Close And Seal The New Diaper

Release your baby’s ankles (which should still be elevated, by the way), and fold the new diaper over their diaper area. Fold the tape fasteners closed (they should attach in the front near your baby’s hips).
Make sure the diaper isn’t too tight or too loose. A good rule of thumb is that you should be able to fit two fingers (your pointer and middle pressed together) between the diaper’s waistband and your baby’s belly.
When the new diaper is secure, place your baby on the floor for some wiggle time, or in their crib for a nap. But wait! You’re not quite done yet. There’s one crucial step left.
9) Dispose Of The Dirty Diaper
Fold the dirty diaper into a ball and secure it closed with the tape fasteners. Dispose of the diaper in the garbage. To keep the smell down, you might want to seal the dirty diapers in ziplock plastic bag or invest in a diaper genie.
And that’s it-- you’re done until the next dirty diaper! With all of the diaper-changing that parenthood involves, you’ll be a pro in no time.
Lastly, let’s talk about something that even the diaper-changing pros and most experienced parents deal with: diaper rash. If it happens to your little angel, don’t worry and don’t feel bad. It’s a common problem.
With a little extra care during your diaper-change routine, you can do away with diaper rash and also help to prevent it in the future.
How To Treat Diaper Rash
Diaper rash is pretty easy to spot. It looks like red, irritated skin around the diaper area. The rash may even look puffy and feel warm to the touch.
Small bumps might appear on your baby’s bottom or thighs. A typical case of diaper rash can be treated at home and usually goes away in a few days.
However, diaper rash can turn ugly. If you notice any of these symptoms, take your little one to the pediatrician as soon as possible:
- Fever
- Blisters or sores
- Pus on their skin
- A yellowish tint to the rash
- Cracked skin or bleeding
If you’re dealing with a run-of-the-mill case of diaper rash, here are a few things you can do during your diaper routine to keep your baby comfortable and make diaper rash a thing of the past.
1) Change Your Baby’s Diaper More Frequently
When your child has diaper rash, change their diaper more frequently than usual. Sitting in a wet or dirty diaper can irritate skin and inflame diaper rash, so it’s important to get them into a dry diaper as soon as possible.
2) Clean Their Bottom Well
When you change your baby, clean their bottom well using gentle, non-irritating, and non-drying wipes.
3) Let Their Bottom Dry
Letting your baby’s bottom dry after cleaning it is also important when it comes to kicking diaper rash to the curb. Leave their diaper off for a couple minutes before putting a clean diaper on, and when you can, let your baby go without a diaper for a longer period of time.
Just remember that they might take a little tinkle, so keep your diaperless angel on a mat, a towel outside, or a tile floor that’s easy to clean.
4) Apply Diaper Cream
Finally, protect your little one’s sensitive bum by applying Diaper Rash Cream 1 2 3, which will relieve irritation and redness and prevent future rash recurrences.
You can also use Cicastela Moisture Recovery Cream for dry, chafed spots in the diaper area. This fragrance-free cream promotes skin recovery and soothes irritated skin by leaving a protective film. Plus, it’s extremely versatile and you can keep it around to use on your little one’s cuts, scrapes, and itchy chicken pox!

Diaper changing might feel intimidating at first, but with the steps and tips listed here, it will become second-nature in no time!
Make each diaper change a special moment between you and your baby, keep lots of Mustela Baby Wipes within reach, and use the right diaper changing products, like our Diaper Rash Sprayable Cream, to prevent diaper rash and keep your baby’s bottom comfortable and healthy. Happy changing!